If you are looking to print out your Canva design and want it to look as good as possible, you will want to download and save your design as a PDF. In this article, I will show you how to turn your Canva designs into high-quality PDFs. Also, I will teach you the difference between PDF Print and PDF Standard, as well as common mistakes to avoid. If you have a question that for some reason isn’t answered here, leave me a comment and I will include that in the article as well.
How To Save / Export A Canva Design As PDF
Below, I am going to show you how to save a Canva design as PDF on computer and in Canva app on the phone or tablet.
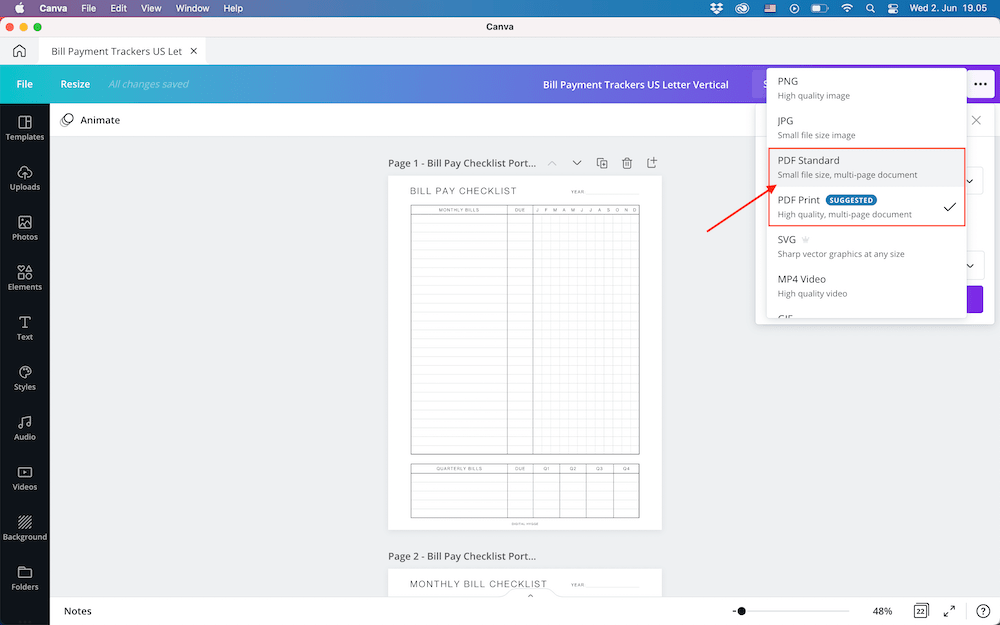
Currently, if you want to download your Canva design there are six alternatives popping up when you click the download button:
- PNG
- JPG
- PDF Standard
- PDF Print
- SVG (Scalable Vector Graphic)
- MP4 Video.
In this article we will focus on the two with the word PDF in them: PDF Standard and PDF Print.
How to save a Canva design as PDF in the browser/computer
If you are using the browser version of Canva, the process of exporting a file there is quite straight forward.
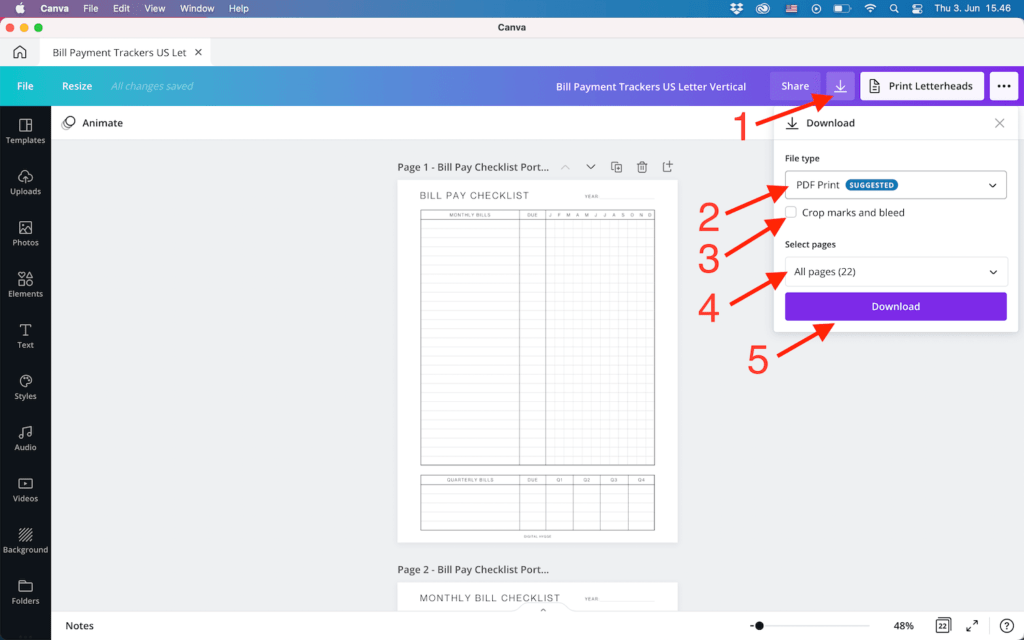
- First, click on the “Download” icon as shown on the picture below.
- Next, chose a file type: PDF Standard or PDF Print. You can read about the difference between the two below or watch my video.
- Depending on your design, put a tick on “crop marks and bleed“. You can learn more about this feature later in this article.
- Now, choose which pages you want to export. By default all the pages are checked. If you want to download only certain pages, you need to remove the first checkbox and manually select the pages you want to export as a PDF.
- Last, click the “Download” button and select where you want to save your file.
How to save a Canva design as PDF on the phone or tablet?
When you save files in the browser, the process, as I mentioned before, is quite simple. However, when you want to save a design as PDF in the Canva app it gets a bit trickier. I got a few people asking me how to do it, so I decided to add this info to the article. I hope this will help you.
You might have noticed that in the app, when you click on the “Download” icon, you get the option to save a design as image. There is nothing else there. So, in order to open the whole download menu, you need to click on the icon next to it.

Next, click on “Save as” button.

You will get the usual download menu open, where you can select the file type and other options like crop marks and print bleed. You can read more about these below.

What is the difference between PDF Standard and PDF Print?
Basically, the difference between these two is in the quality. As you can tell from the names already, one of these are better for printing purposes. But it is actually a bit more complicated than that. So, what is the difference between these two and when is PDF Standard to be preferred over PDF Print, and vice versa?
What is PDF Standard?
PDF Standard is perfect for any digital uses. If you intend to use the PDF online and assume that people will watch it on their mobile phone, tablet or computer then PDF Standard is the right choice for you.
Compared to PDF Print, PDF Standard has a lower resolution of 96 dpi (printer dots per inch). It won’t take up much space on the hard drive, making it perfect for all non-printing uses. To summarize, PDF Standard should be your go-to option when downloading your Canva design as a PDF (especially for mobile use).
What is PDF Print?
Print PDF is the format to choose when you have a design that you want to print out in the best possible quality. The three times higher resolution of 300 dpi (printer dots per inch) is what makes most of the difference here. That’s not all, however. The Print PDF format also allows you to add bleed and crop marks to your designs. This is especially important if you are going to print your designs and want them to look professional.
How to add bleed and crop marks to a PDF in Canva
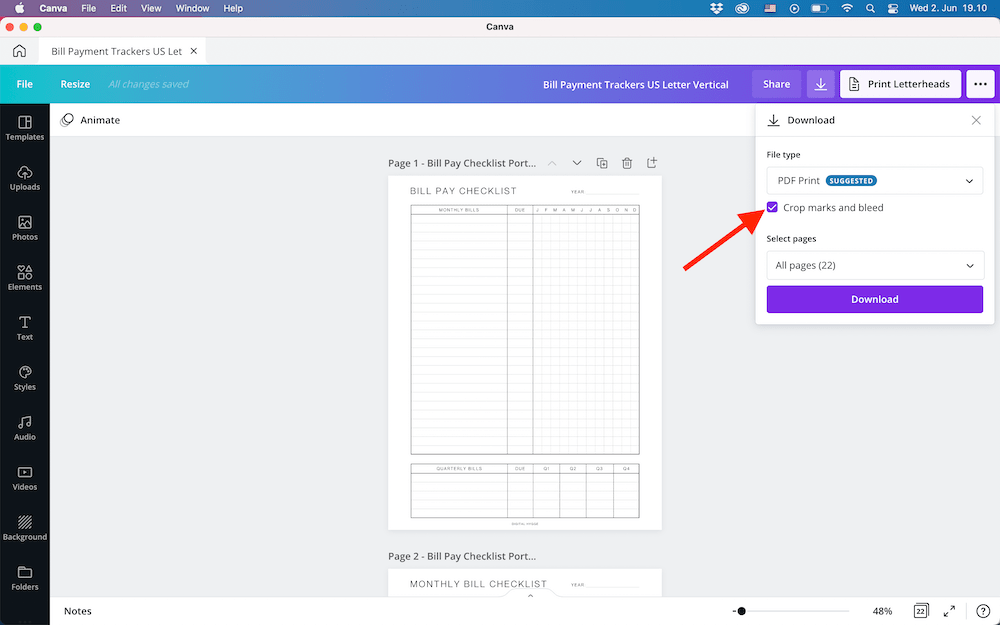
When you download a design in the PDF Print format, you can choose to tick a box that says “crop marks and bleed“. What is that for and what do those words even mean?
Print Bleed In Canva
Bleed is a printing term that requires an explanation. Basically, by adjusting the bleed you can avoid white borders around your design when printing. You do this by extending the objects in your design over the edge of the area intended for printing. In Canva, you can adjust these objects easily. People, however, often have troubles finding this option in the first place since it is hidden away. Here’s how you find it:
How to show bleed in Canva?
- Create or open an existing design that you want to print as a PDF.
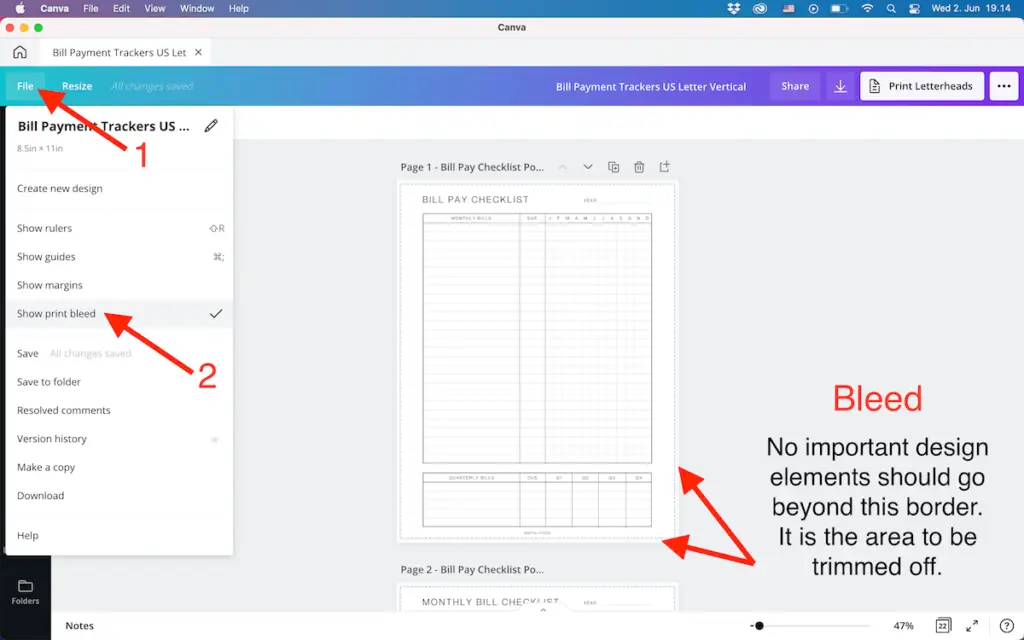
- Next, click on “File” in the upper menu panel.
- In the drop down menu select “Show print bleed“. You will now see a fine dotted line appearing close to the edges of your design: the print bleed.
How to avoid a white border when printing a PDF?
If you have selected “Show print bleed” and see white gaps around your design, you will need to stretch the elements or background to cover them. Be careful not to move objects in a way that distorts the original design in an unwanted way. When you no longer see the white borders, your job is done.
How to add crop marks to a PDF?
Crop marks are used to mark where the paper is supposed to be trimmed by the printer. Adding crop marks to a PDF is possible in Canva when selecting PDF Print as the download format. It cannot be done when choosing PDF Standard for a simple reason: crop marks are only relevant when printing a product and thus only applies to PDFs of the highest printing quality: PDF Print.
How to add crop marks in Canva
- To download your design, go to Download.
- Select PDF Print from the drop-down menu.
- Check the box that says crop marks and bleed.
I hope this article was informative for you. Let me know if you have any questions in the comments section below.