
In graphic design, layers play a crucial role in streamlining the creative process. They are essential to any design workflow, as they allow you to work on individual parts of an image without affecting other elements. By using layers, you can modify your image, add text, change colors, combine multiple pictures, and much more, all while preserving the integrity of your original photo. Canva, a user-friendly graphic design tool, offers an intuitive layering system that makes working with layers a breeze.
In this guide, you will learn how to effectively use layers in Canva. I will do my best to provide you with all the information you need in a single article, covering everything from adding and customizing elements to managing and organizing layers.
Table of Contents:
- What Are Layers in Canva
- How to see layers in Canva
- What can you do with layers in Canva:
- Frequently Asked Questions:
What Are Layers in Canva
It’s important to note that layers in Canva function differently compared to professional design tools like Photoshop or Illustrator. In Canva, each separate element, whether it’s an image, text box, or graphic element, is considered a layer. For example, when you create a new text box, it automatically becomes a new layer.
Working with layers simplifies the process of handling complex designs containing multiple elements. They make it much easier to select overlapping elements, as well as move them forward or backward. Moreover, layers allow you to group or merge elements, duplicate them, and copy styles. We’ll delve deeper into layer functionality later in this post.
Now, let’s explore how you can view the layers you’ve created in Canva.
How to See Layers in Canva
Accessing layers in Canva is incredibly straightforward, with two easy-to-use methods available. Both methods are equally simple, so you can choose the one that suits your preferences or switch between them as needed.
Method 1: Using the “Position” option
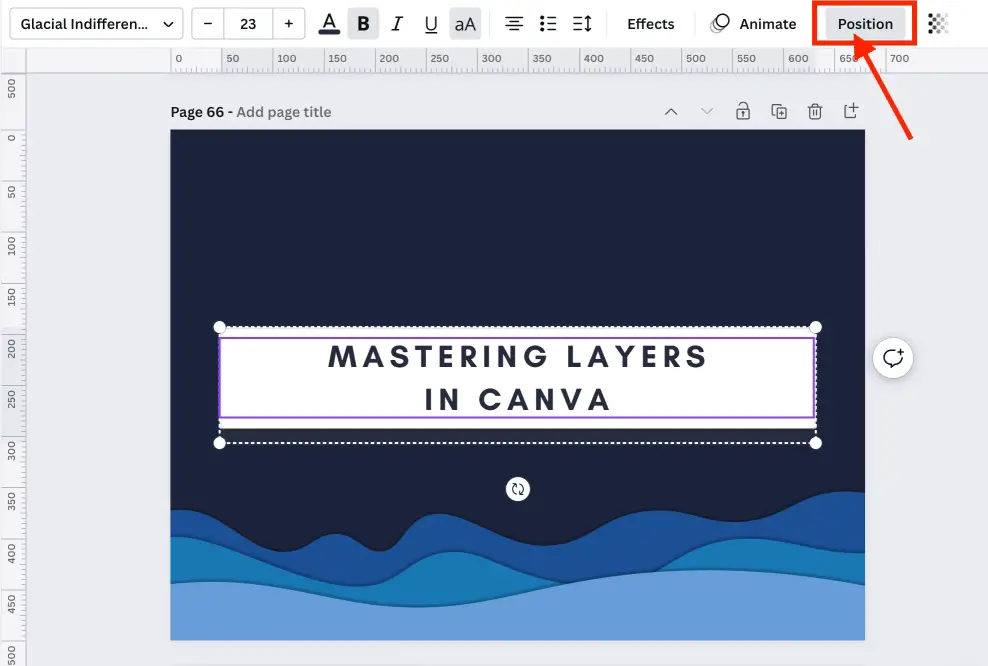
- Click on any element in your design. This could be an image, shape, or text.
- In the toolbar above the editor, click on the “Position” button.
- A dropdown menu will appear with two sections: “Arrange” and “Layers”. The “Arrange” section provides options related to the position of the selected element, while the “Layers” section allows you to access and manage layers in your design.
Method 2: Using Canva Assistant
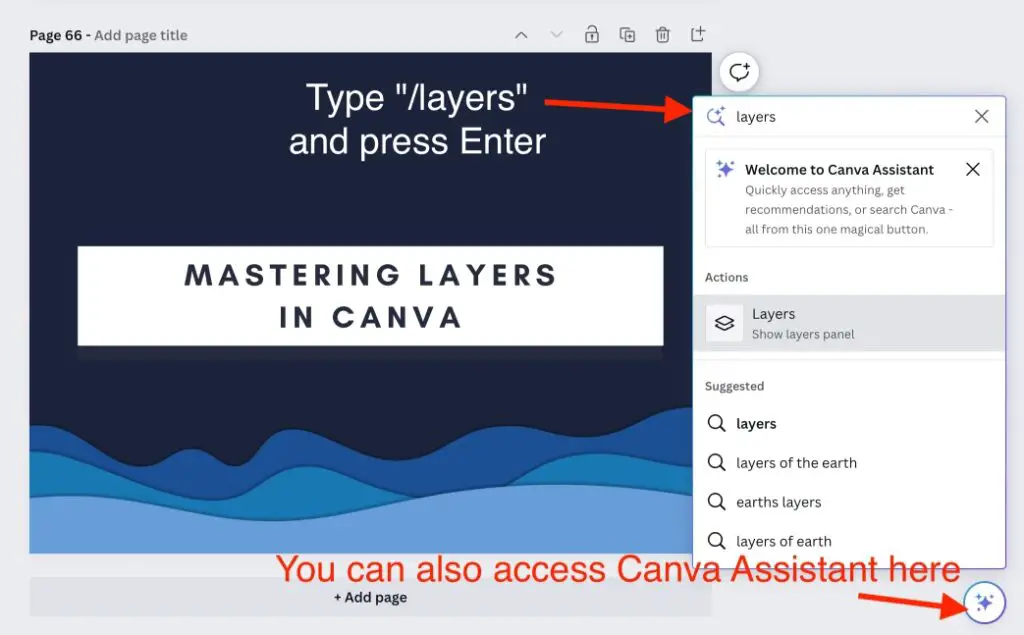
- Activate Canva Assistant by clicking on the “Assistant” button located at the bottom right corner of the editor or by pressing the “/” key on your keyboard.
- In the Canva Assistant search bar, type “/layers” and press Enter.
- Canva Assistant will display a list of layers in your design, allowing you to quickly access and manage them.
With these two methods at your disposal, accessing layers in Canva becomes a breeze, allowing you to focus on creating stunning designs with ease.
What Can You Do with Layers in Canva
Working with layers in Canva provides you with a range of options to efficiently manage and modify elements in your design. In this section, we’ll briefly discuss the different functionalities available for layers, helping you understand why using layers can enhance your design process.
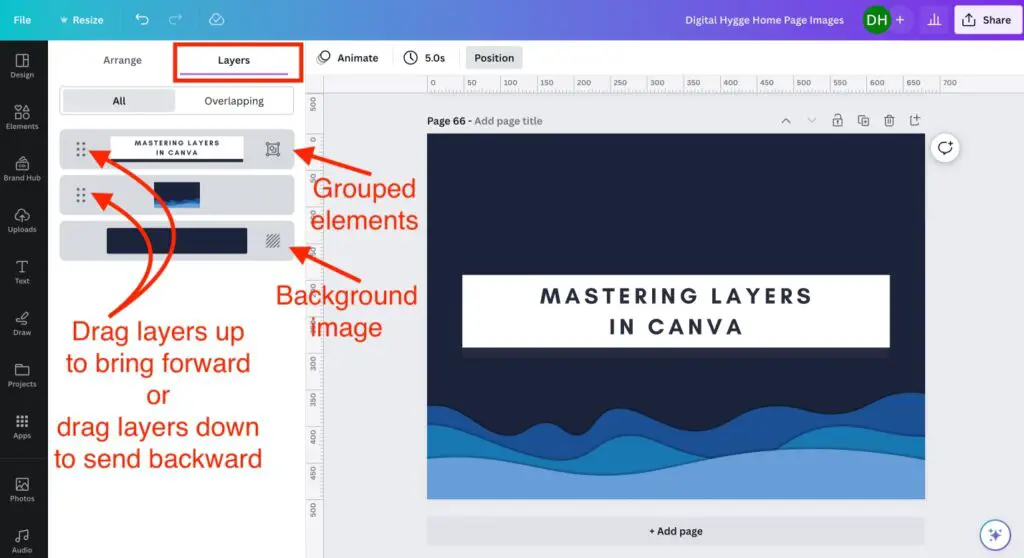
The following screenshot will help you understand how to work with layers in Canva. Through the layers interface, you can effortlessly access the background image layer, view individual layers, and view grouped elements. When you select a layer (as demonstrated in the image), you can easily drag it up or down to change its position within the design.
If you want to access the functions for each layer, simply select the desired layer and click the “…” icon to open the menu. Refer to the screenshot below for more details.

What is the Difference Between “All” and “Overlapping” Tabs
In the Layers panel, you will find two tabs: “All” and “Overlapping“. The “All” tab shows a list of all layers in your design, whereas the “Overlapping” tab displays only those layers that overlap or intersect with the currently selected element.
Now let’s go through each function one by one.
How to Arrange Layers
- Drag layers up or down in the Layers panel to change their order in the design.
- Alternatively, use the “Arrange” options from the “Position” button to send elements backward or forward, or bring them to the front or back.
How to Copy, Duplicate and Delete Layers
Right-click on a layer or click the three-dot menu to access options for copying, duplicating, or deleting the layer.
How to Align Layers
Align elements to the page by selecting the layer and clicking the “Align” button in the toolbar. Choose from options such as “Align to top”, “Align horizontally”, and “Align to bottom”.
How to Copy Style of a Layer
Quickly apply the style of one element to another by using the “Copy style” function. Right-click on the source layer, select “Copy style”, then right-click on the target layer and choose “Paste style”.
How to Lock a Layer
Lock a layer to prevent accidental modifications or movement. Click the lock icon next to the layer in the Layers panel to lock or unlock it.
Using layers in Canva offers a more organized and efficient way of working with your designs. The various functionalities available for layers allow you to easily modify and manage elements, ultimately leading to a smoother design process and more professional-looking results.
Frequently Asked Questions (FAQ) about Layers in Canva
Yes, you can group multiple layers together in Canva. Simply select the layers you want to group by holding down the Shift key and clicking on each element. Then, right-click and choose “Group” from the context menu, or click the “Group” button in the toolbar above the editor.
To ungroup layers in Canva, click on the grouped layers and then either right-click and choose “Ungroup” from the context menu or click the “Ungroup” button in the toolbar above the editor.
As of now, Canva doesn’t provide a built-in option to rename layers. However, you can keep your layers organized by using descriptive element names and arranging them logically in the Layers panel.
Canva does not currently support layer folders. However, you can use the grouping feature to combine related layers, making it easier to manage and organize your design elements.
Yes, you can change the opacity of a layer in Canva. To do so, click on the layer you want to adjust, and then use the “Transparency” slider located in the toolbar above the editor to change the opacity.
To add a new layer in Canva, either click on the “Elements” button in the left menu to search and add a new element, or upload your own image by clicking on “Uploads” in the left menu and then “Upload files”. Once you add a new element or image to your design, it automatically becomes a new layer.
Canva does not currently have a built-in feature to merge layers. However, you can use the grouping function to combine multiple layers into a single entity for easier management.
Let me know in the comments if you have other questions and I will do my best to help you out 🙂